This week, I made Irish brown bread for improviser extraordinaire, Justin Peters!
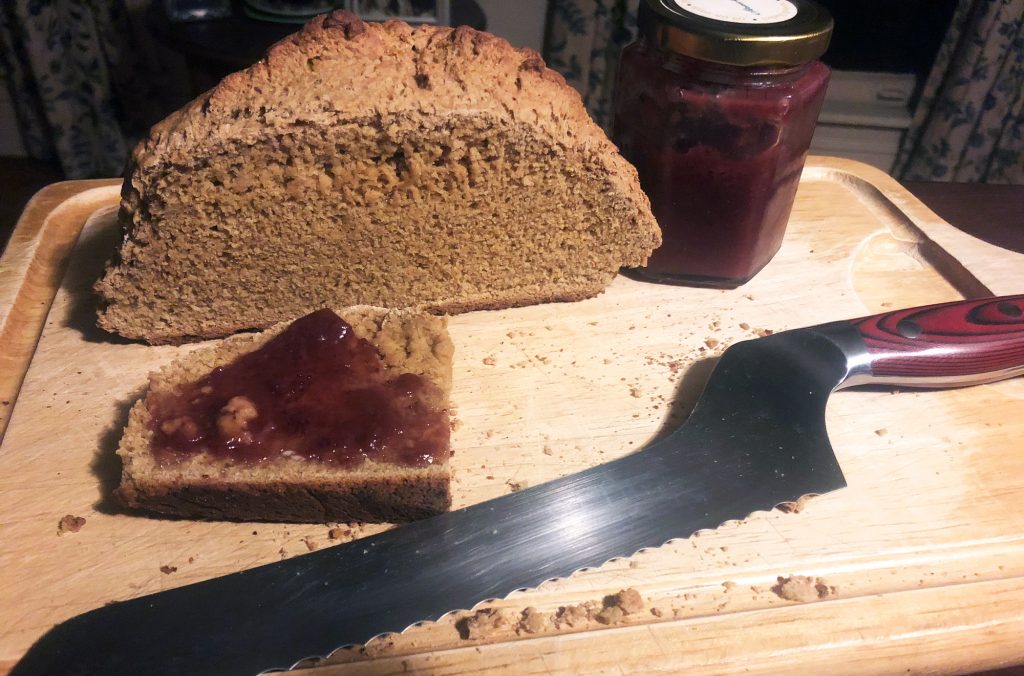
Irish brown bread is like a darker, heartier cousin to the more popular Irish soda bread. It uses baking soda and baking powder in place of yeast, and uses a kind of flour with a lower gluten content, leading to a dense, somewhat crumbly bread. It’s a little sweet, and it’s absolutely spectacular when toasted and spread with a little jam (I used some strawberry rhubarb preserves from a friend’s wedding and that was basically breakfast for a week).
You know how I’ve mentioned flour, water, salt, and yeast as the Big Four of bread? Well this only has two, flour and salt. The dough is halfway between dough and batter, so it uses some traits more common to batter bread, i.e., the hydration comes from buttermilk and the leavening comes from the baking soda/powder. It doesn’t need to rise, it requires very minimal kneading, it’s so easy. You can have it done, start to finish, in about an hour. Try it tonight!
Irish brown bread makes a decent avocado toast. Nothing spectacular, but pretty good. Beware the crumblies.
🥑 🥑 🥑 /5
And now, on to the recipe:
Irish Brown Bread
Dough:
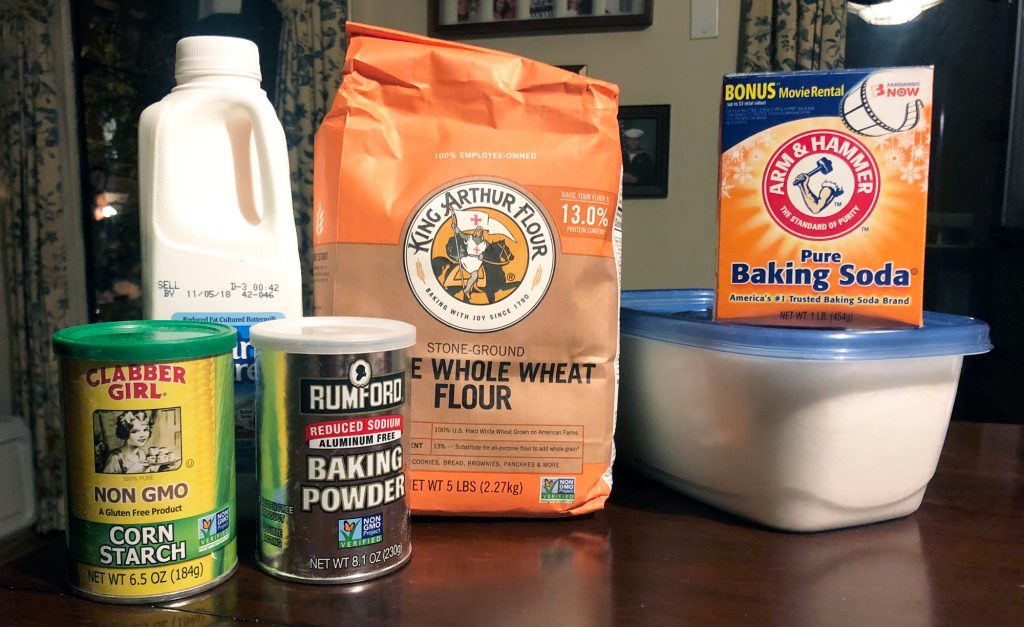
• 4C Whole Wheat Flour (Ideally, try to get Irish-style or Pastry flour, as those have lower gluten content. If not those, look for stone-ground WW flour like I used here. Failing any of those, standard WW flour will do, although your bread might be a bit more open and less textured.)
• 2.5T sugar
• 1t salt
• 1t baking soda
• 2t baking powder
• 1½C buttermilk
• 2T butter (melted)
• 2T molasses
1. Preheat the oven to 400º. Grease or parchment-line a baking sheet.
2. In a large bowl, mix together the flour, sugar, salt, baking soda, and baking powder. Make a little well and pour in the buttermilk and butter and molasses.
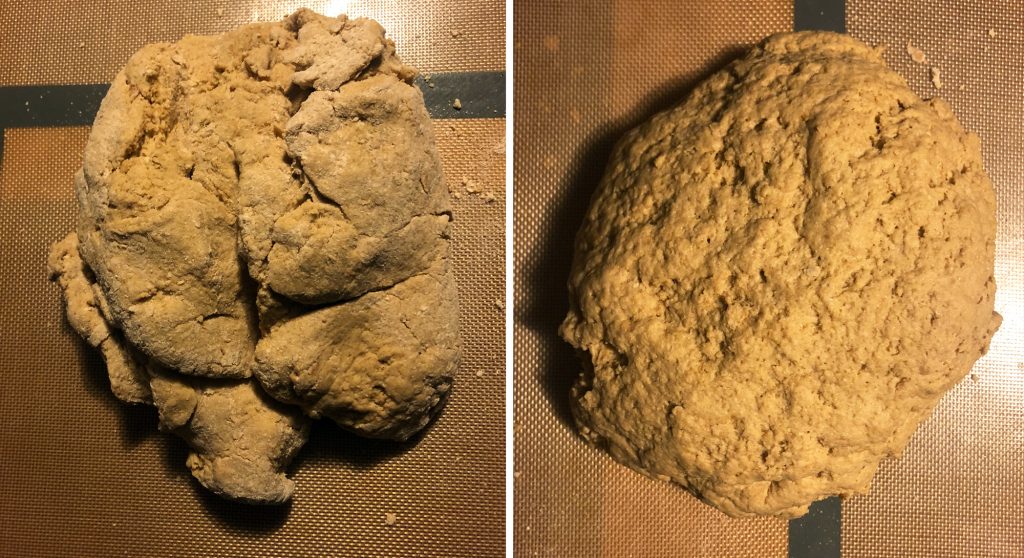
3. Mix it all up until just incorporated, but maybe still a li’l lumpy, like me after a long winter eating bread and hibernating.
4. Dump it out onto a floured surface and knead a few times—maybe 10-15—until the dough tightens up a bit and holds together.
5. Shape it into a ball and place it on your prepared baking sheet. Cut a deep X in the top with a sharp knife. Normally, when slashing dough, you don’t want to go too deep for fear of deflating the bread and losing all that built up CO2. This bread hasn’t risen, so you can go pretty deep with this slash (like, ½”. Don’t go nuts).
6. Bake for about 40 minutes, or until a wooden skewer inserted in the middle comes out clean.
7. Let cool for at least 20 minutes before slicing (I did not let it cool long enough, so it’s a little gummy where I cut it. C’est la vie. I also forgot to take a picture of the whole finished loaf…c’est la vie again. There was a lot going on that night. Don’t judge me.) Enjoy!
If you’re interested in baking, I really do recommend you try this one. It’s so easy, and then you have bread! Thanks to Justin for the request. See you all soon!
———————————– –
Short steps list:
- Preheat to 400° F. Grease or parchment a baking sheet.
- Mix all dry ingredients.
- Add wet ingredients, mix until just incorporated.
- Knead briefly, until it all holds together.
- Shape into a ball, score.
- Bake 40 minutes or until a wooden skewer comes out clean.
0 Comments